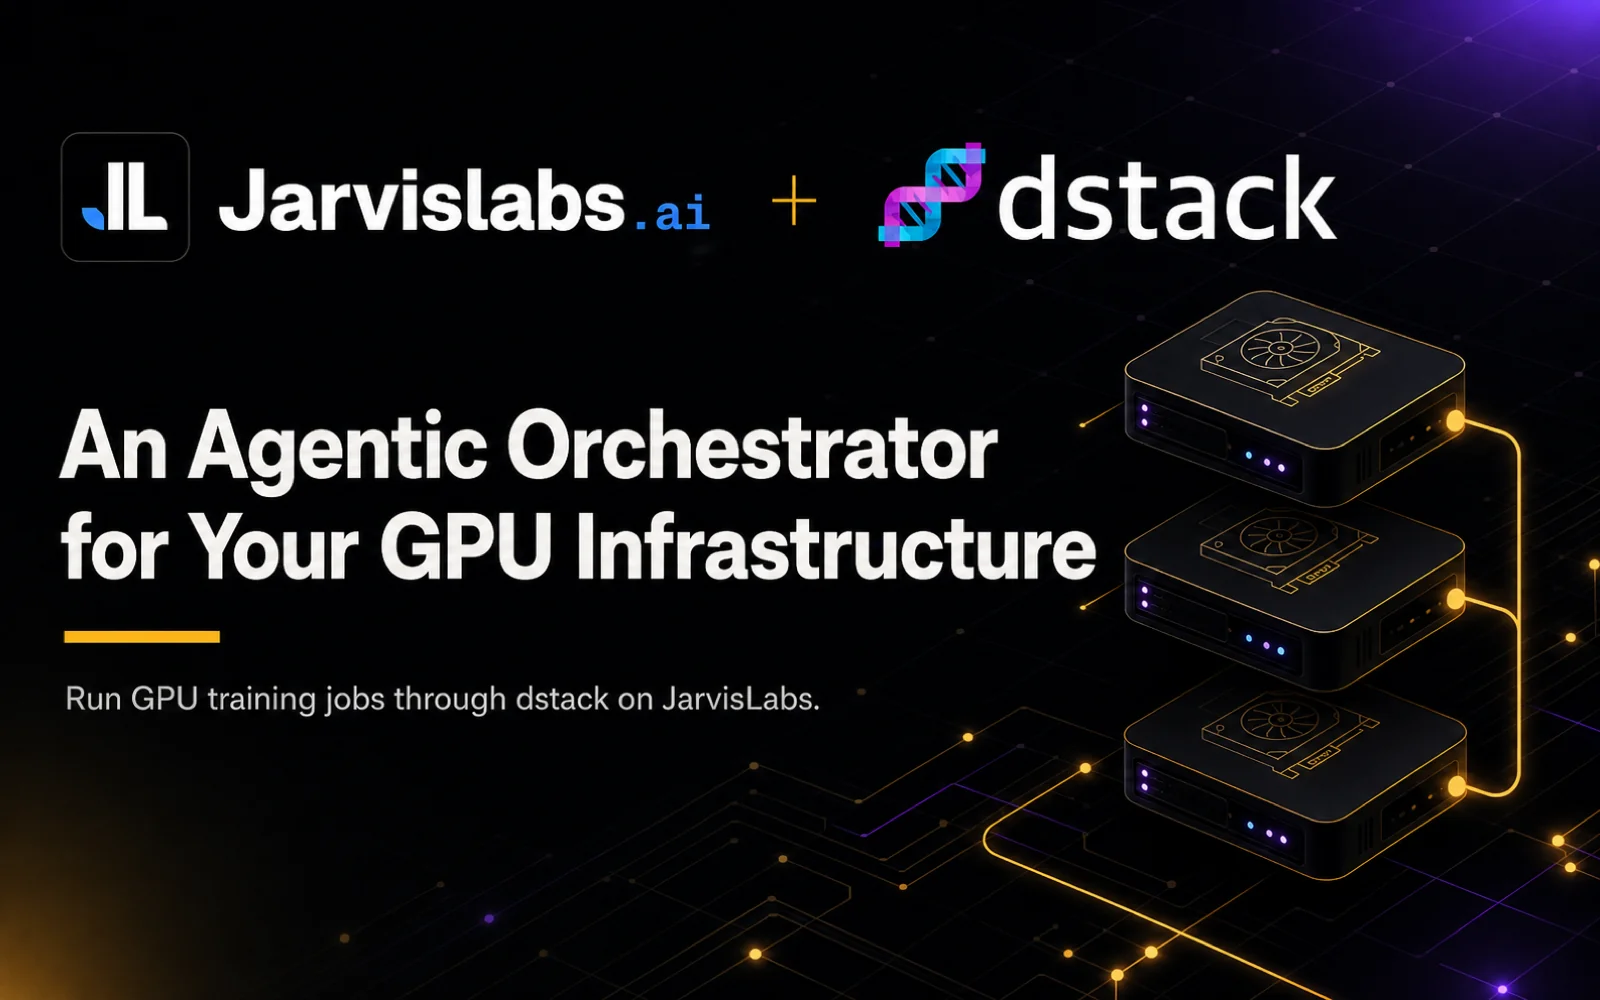
dstack x JarvisLabs: An Agentic Orchestrator for Your GPU Infrastructure
JarvisLabs.ai
Running things on a cloud GPU usually means babysitting infrastructure. You create the VM, install dependencies, copy code in, expose ports if it is a service, watch logs, and shut everything down when you are done. Whether the end goal is a training run, a model endpoint, or an interactive dev box, you spend most of the time on chores around the actual work.
dstack is a unified control plane for GPU compute. You describe what you want in YAML and submit it with dstack apply. The same workflow covers training tasks, services that stay up, interactive dev environments, fleets, and volumes on supported backends. dstack handles the lifecycle: provisioning, container start, logs, status, auto-scaling for services, and cleanup based on the policy you set. It works across GPU clouds, Kubernetes, and on-prem clusters, with NVIDIA, AMD, TPU, and Tenstorrent.
JarvisLabs is now available as a dstack backend. In this tutorial, we will look at what that means in practice: how dstack fits into the GPU workflow, what features it gives you, how to connect it to your JarvisLabs account, and how to run a couple of jobs so you can get a feel for the full lifecycle.
How dstack works
dstack acts as the control layer for the workflow. You submit a YAML file from the dstack CLI, the dstack server records the run, and the JarvisLabs backend provisions the GPU VM that will execute it.

The dstack server is where dstack keeps the state for your project. It stores the backend configuration, fleet definitions, submitted runs, and logs. When you run a command from the dstack CLI, the CLI talks to this server and the server coordinates the work from there.
For quick local experiments, you can run the server on your laptop. For regular use, it is better to keep it running on a small VPS or a JarvisLabs CPU VM. Even a cheap 2 CPU, 8 GB RAM VM that we offer is enough for running a dstack server 24/7. This lets you submit a job, close your laptop, and let the server keep managing the run. The server tracks logs, updates job state, and shuts down idle GPU VMs based on the cleanup policy you set in the config. We will look at that cleanup policy later in the tutorial.
Install dstack first:
uv tool install "dstack[all]" -UThen start the server:
dstack serverIf the server is running somewhere else, such as a VPS or a shared team machine, add it as a dstack project from your local CLI:
dstack project add \
  --url http://<your-dstack-server>:3000 \
  --name main \
  --token <your-dstack-token>
After that, your local dstack apply commands talk to the hosted server instead of a server running on your laptop.
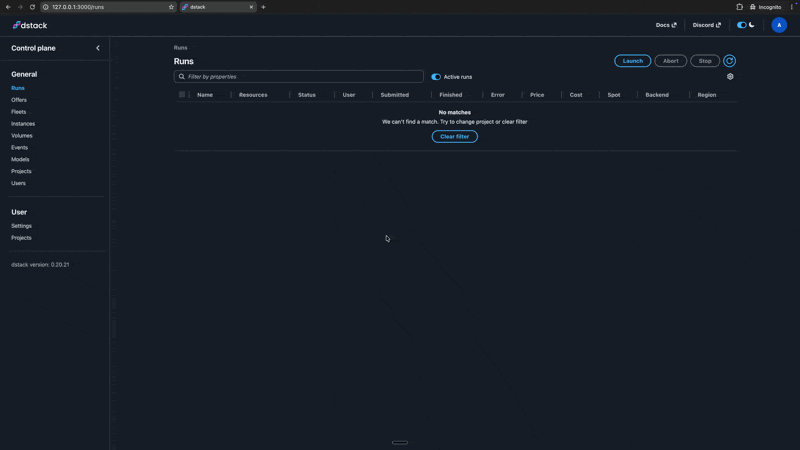
The dashboard is useful once the server is running somewhere shared, because you can check runs, logs, fleets, and VM state without staying attached to the original terminal.
Main dstack concepts
Before we run jobs, it helps to understand the dstack objects that show up in the YAML files and dashboard: backends, fleets, tasks, services, and dev environments.
Backend
A backend tells dstack where compute should come from. In this tutorial, the backend is JarvisLabs. Once you add your JarvisLabs API key to the dstack server config, dstack can ask JarvisLabs for GPU VMs on your behalf.
You can create a JarvisLabs API key from JarvisLabs API Keys, then add it to ~/.dstack/server/config.yml:
projects:
  - name: main
    backends:
      - type: jarvislabs
        creds:
          type: api_key
          api_key: <your-jarvislabs-api-key>
If the dstack server is already running, restart it after editing this file so it loads the new backend config.
dstack also supports other ways of bringing compute into the same workflow. You can connect cloud backends, Kubernetes clusters, or existing machines over SSH. That is useful if your team already has infrastructure in different places and wants one way to submit jobs across them. You can read more in the dstack backends documentation. For this tutorial, we will stay focused on the JarvisLabs backend.
Fleet
A fleet is the compute pool dstack uses for your runs. In a JarvisLabs setup, it describes the kind of VM dstack is allowed to create: which backend to use, which region to pick, what GPU and disk size you need, how many machines can exist at once, and how long idle machines should stay around.
Every .dstack.yml file you apply starts with a type field. It tells dstack what you are defining: a fleet, task, service, dev-environment, volume, or gateway. Here, we start with type: fleet because we are defining the compute pool that our task will use.
Here is a simple fleet for running the first job on a JarvisLabs L4 VM:
type: fleet
name: jarvislabs-quickstart

nodes: 0..1
idle_duration: 10m

backends: [jarvislabs]
regions: ["india-noida-01"]

resources:
  gpu: L4:2
  disk: 150GB
The backends: [jarvislabs] line is what ties this fleet to the JarvisLabs backend we configured above. dstack supports many more fleet options, including different regions, GPU requirements, node ranges, placement, SSH fleets, and idle behavior. You can explore the full set in the dstack fleets documentation.
Save this as jarvislabs-fleet.dstack.yml and apply it:
dstack apply -f jarvislabs-fleet.dstack.ymlAfter you confirm the prompt, dstack creates the fleet and shows the resolved policy. In the terminal output below, the fleet is active, uses the jarvislabs backend in india-noida-01, and can grow from 0 to 1 nodes. The L4:2 value means each VM created from this fleet should have two L4 GPUs.
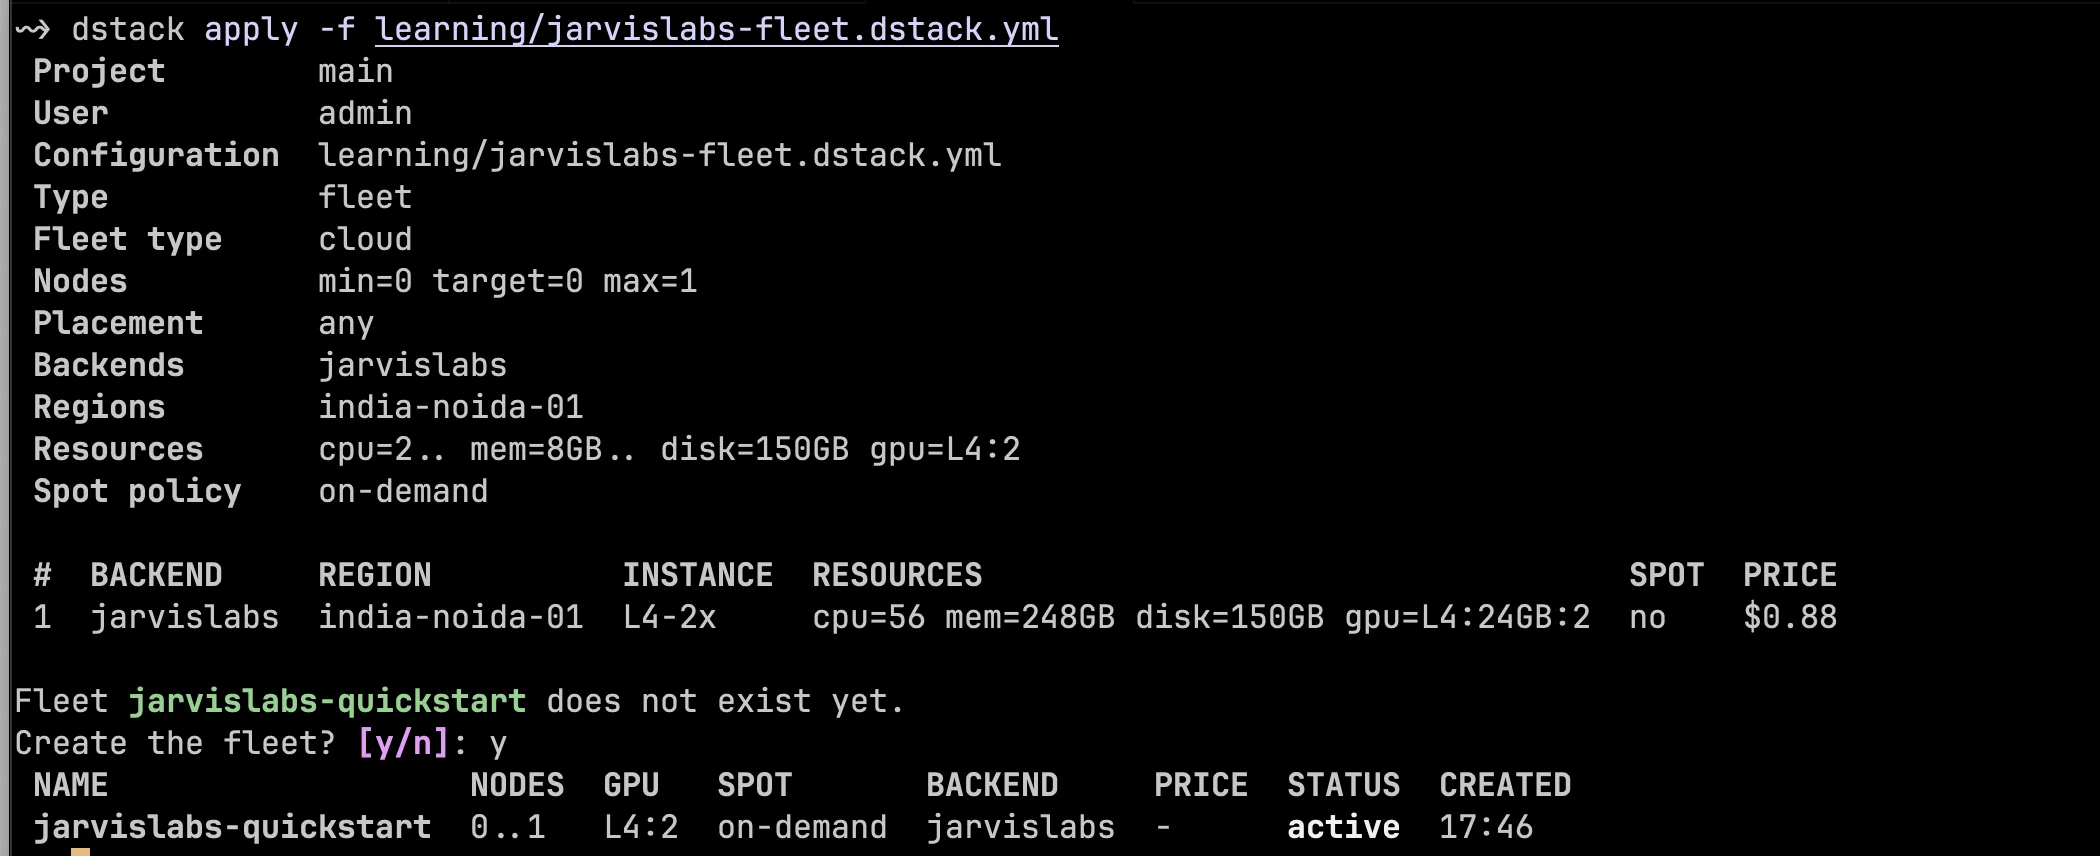
The important field here is nodes: 0..1. In dstack, a node means one machine, not one GPU. In this fleet, each node is a JarvisLabs VM with the resources we defined below, so one node means one machine with 2 L4 GPUs and 150 GB of disk. The 0..1 range tells dstack to keep zero GPU VMs running by default, but allows it to create one VM when a task needs compute. When the job is done, the VM can return to idle and then be cleaned up based on idle_duration.
Because this fleet uses nodes: 0..1, creating it only creates the policy and does not start billing by itself. JarvisLabs sees a VM request when a run uses this fleet and dstack needs to provision a machine. The same definition can back any number of runs: a training run, a benchmark, an eval, all targeting the same fleet without redefining the compute. If you want a single VM to stay warm between tasks for tight iteration loops, switch the range to nodes: 1 and dstack keeps one machine alive at the cost of paying for it idle.
This is why fleets matter for cost control. You can define a small fleet for lightweight jobs and a larger fleet for heavier training runs, instead of using the same expensive machine for everything. The idle_duration field controls how long dstack keeps an idle VM around after a run finishes.
Task
A task is a one-off job. Use a task when you want to run a training script, a benchmark, a data preparation command, or a short first run to check that the full path is working. A task points to a fleet, defines the container environment, and lists the commands dstack should run inside that container.
Here is a simple task that runs on the jarvislabs-quickstart fleet we created above:
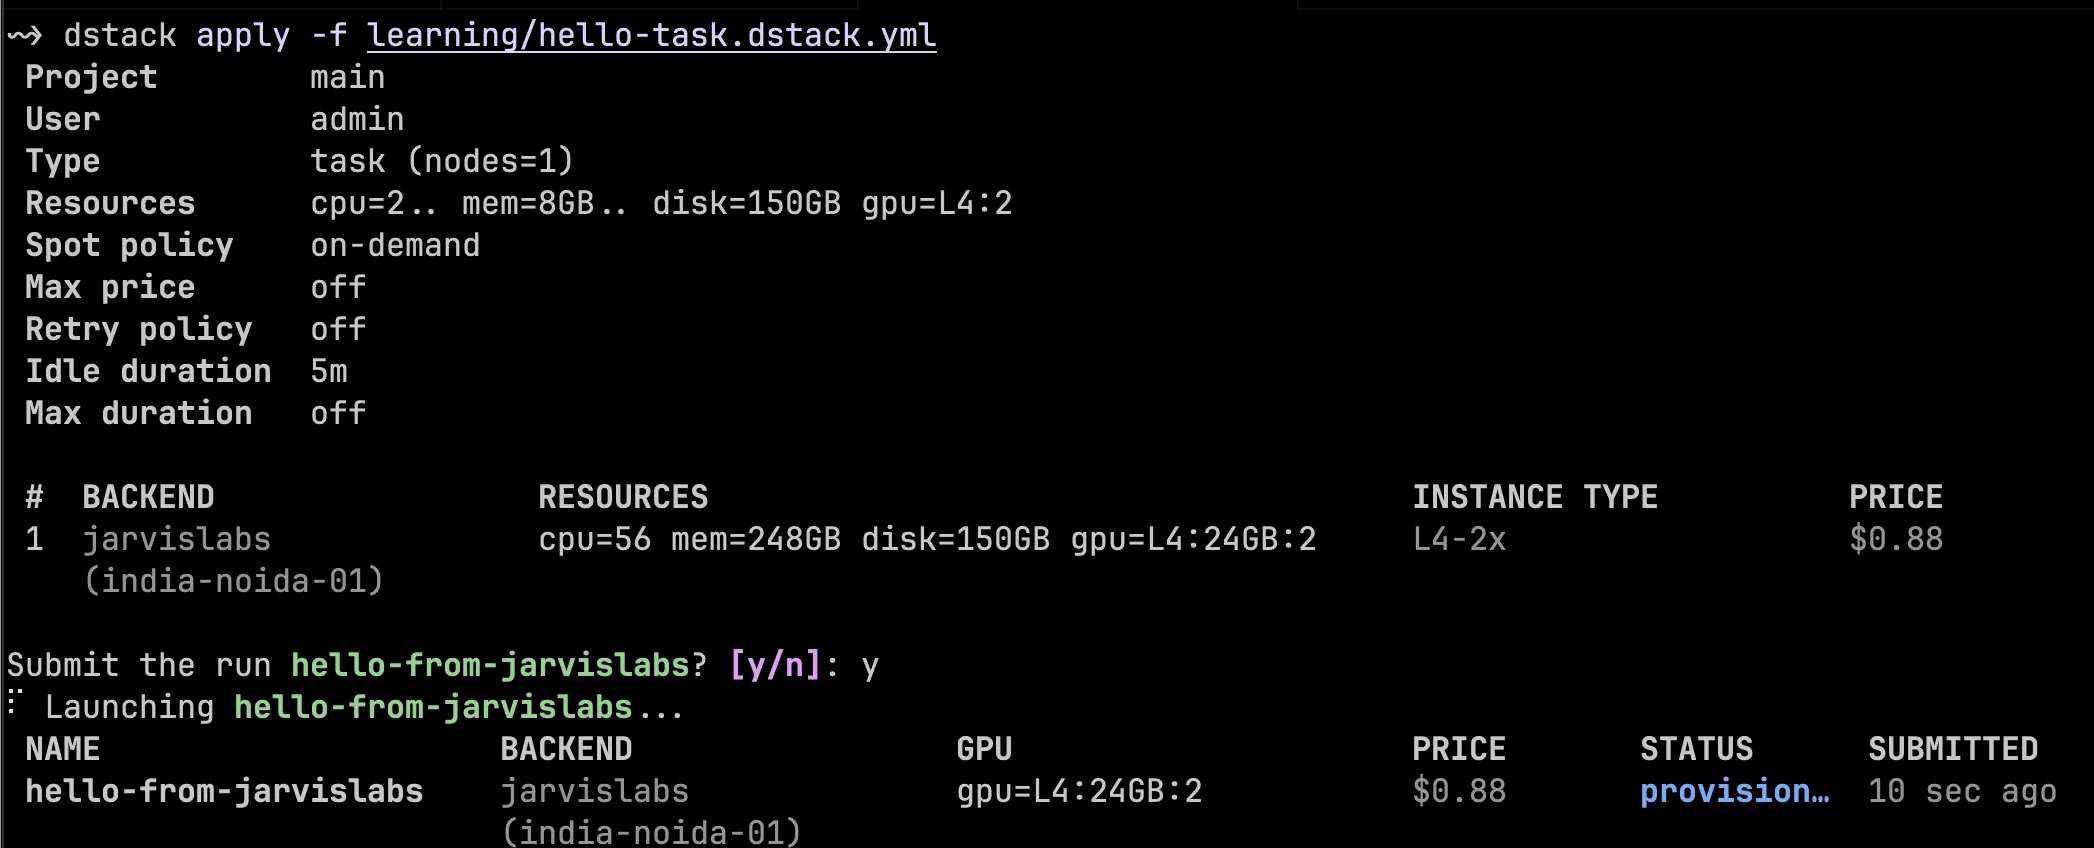
type: task
name: hello-from-jarvislabs

python: "3.12"

fleets: [jarvislabs-quickstart]

commands:
  - python --version
  - uv pip install torch --index-url https://download.pytorch.org/whl/cu124
  - |
    uv run python - <<'PY'
    import os
    import torch

    print("Hello from dstack on JarvisLabs")
    print("node rank:", os.getenv("DSTACK_NODE_RANK"))
    print("nodes:", os.getenv("DSTACK_NODES_NUM"))
    print("gpus per node:", os.getenv("DSTACK_GPUS_PER_NODE"))
    print("torch cuda available:", torch.cuda.is_available())
    print("torch cuda device count:", torch.cuda.device_count())
    for index in range(torch.cuda.device_count()):
        print(f"cuda:{index} device name:", torch.cuda.get_device_name(index))
    PY

resources:
  gpu: L4:2
  disk: 150GB
This task asks dstack to use the jarvislabs-quickstart fleet and run on a JarvisLabs VM with 2 L4 GPUs and 150 GB of disk. dstack provisions the VM, starts a Docker container on it, and runs your task commands inside that container. In this example, the commands run in order: print the Python version, install PyTorch, then run a short Python snippet that prints the dstack node metadata and the GPUs visible to PyTorch.
Because this task does not set image, dstack uses its default base Docker image for the container. The dstack docs describe this image as preconfigured with uv, python, pip, essential CUDA drivers, mpirun, and NCCL tests. In the current dstack source, the default image resolves to dstackai/base:0.12-base-ubuntu22.04 unless the server overrides the base image settings.
If your project already has its own Docker image, set the image field instead of relying on the default image:
image: nvcr.io/nvidia/pytorch:25.05-py3Save this as hello-task.dstack.yml and submit it:
dstack apply -f hello-task.dstack.ymlAt this point, dstack uses the jarvislabs-quickstart fleet policy to provision a matching JarvisLabs VM, starts the container, runs the commands, and streams the output back to the dstack server. The submit output shows the run name, backend, requested GPU resources, estimated price, and current status.
After the run starts, dstack streams the logs in the same terminal. The log output below shows the container starting, Python 3.12 running inside /dstack/venv, PyTorch being installed, and the final script seeing two NVIDIA L4 GPUs. The run exits with code 0, which means the task finished successfully.

You can also check recent runs from the CLI:
dstack ps -aIn dstack terminology, the submitted task is now a run. That is why commands like dstack ps, dstack attach, dstack logs, and dstack stop operate on the run name, hello-from-jarvislabs.
dstack tasks support much more than inline commands. You can run scripts, attach local files, clone a GitHub repository into the workspace, set environment variables, choose a Docker image, request specific resources, and configure distributed jobs. We will use some of those options in the larger training example later. For the full reference, see the dstack task documentation.
Services and dev environments
Tasks are good for jobs that start, do work, and exit. dstack also supports services and dev environments.
A service is for something that should keep running, such as an inference API, model server, web app, or internal tool. Instead of exiting after the commands finish, a service stays up and can expose a port or endpoint.
A dev environment is for interactive work on a remote GPU machine. Use it when you want a GPU-backed workspace for debugging, notebooks, IDE access, or iterative development before turning the workflow into a repeatable task. This is useful when you are still figuring out the exact commands, dependencies, or dataset paths.
You can read more in the dstack services documentation and dstack dev environments documentation.
Where JarvisLabs fits
JarvisLabs is a VM-based backend in dstack. That means dstack provisions a full JarvisLabs GPU VM through the backend integration, then runs your workload inside a container on that VM. This gives dstack control over VM provisioning, fleet size, idle cleanup, and the machine lifecycle.
Now that the basic flow is clear, let's run a more realistic training workload through the same JarvisLabs backend.
Run nanochat on 2x H100
The first task gave us the basic lifecycle: define a fleet, submit a task, watch logs, and let dstack clean up the VM after the work is done. Now we will use the same flow for a training workload that looks closer to what developers actually run: clone a repo, install dependencies, prepare a small dataset, and launch distributed training on multiple GPUs.
For this example, we will use nanochat, Andrej Karpathy's minimal full-stack LLM training repo. The full nanochat speedrun is designed for larger H100 nodes and takes much longer, so we will run a smaller 2x H100 training job that still shows the real workflow: clone the repo, install dependencies, prepare data, train the tokenizer, and launch distributed training.
First, define a separate H100 fleet:
type: fleet
name: nanochat-h100x2

nodes: 0..1
idle_duration: 0s

backends: [jarvislabs]
regions: ["india-noida-01"]

resources:
  gpu: H100:2
  disk: 250GB
Save this as nanochat-fleet.dstack.yml and apply it:
dstack apply -f nanochat-fleet.dstack.yml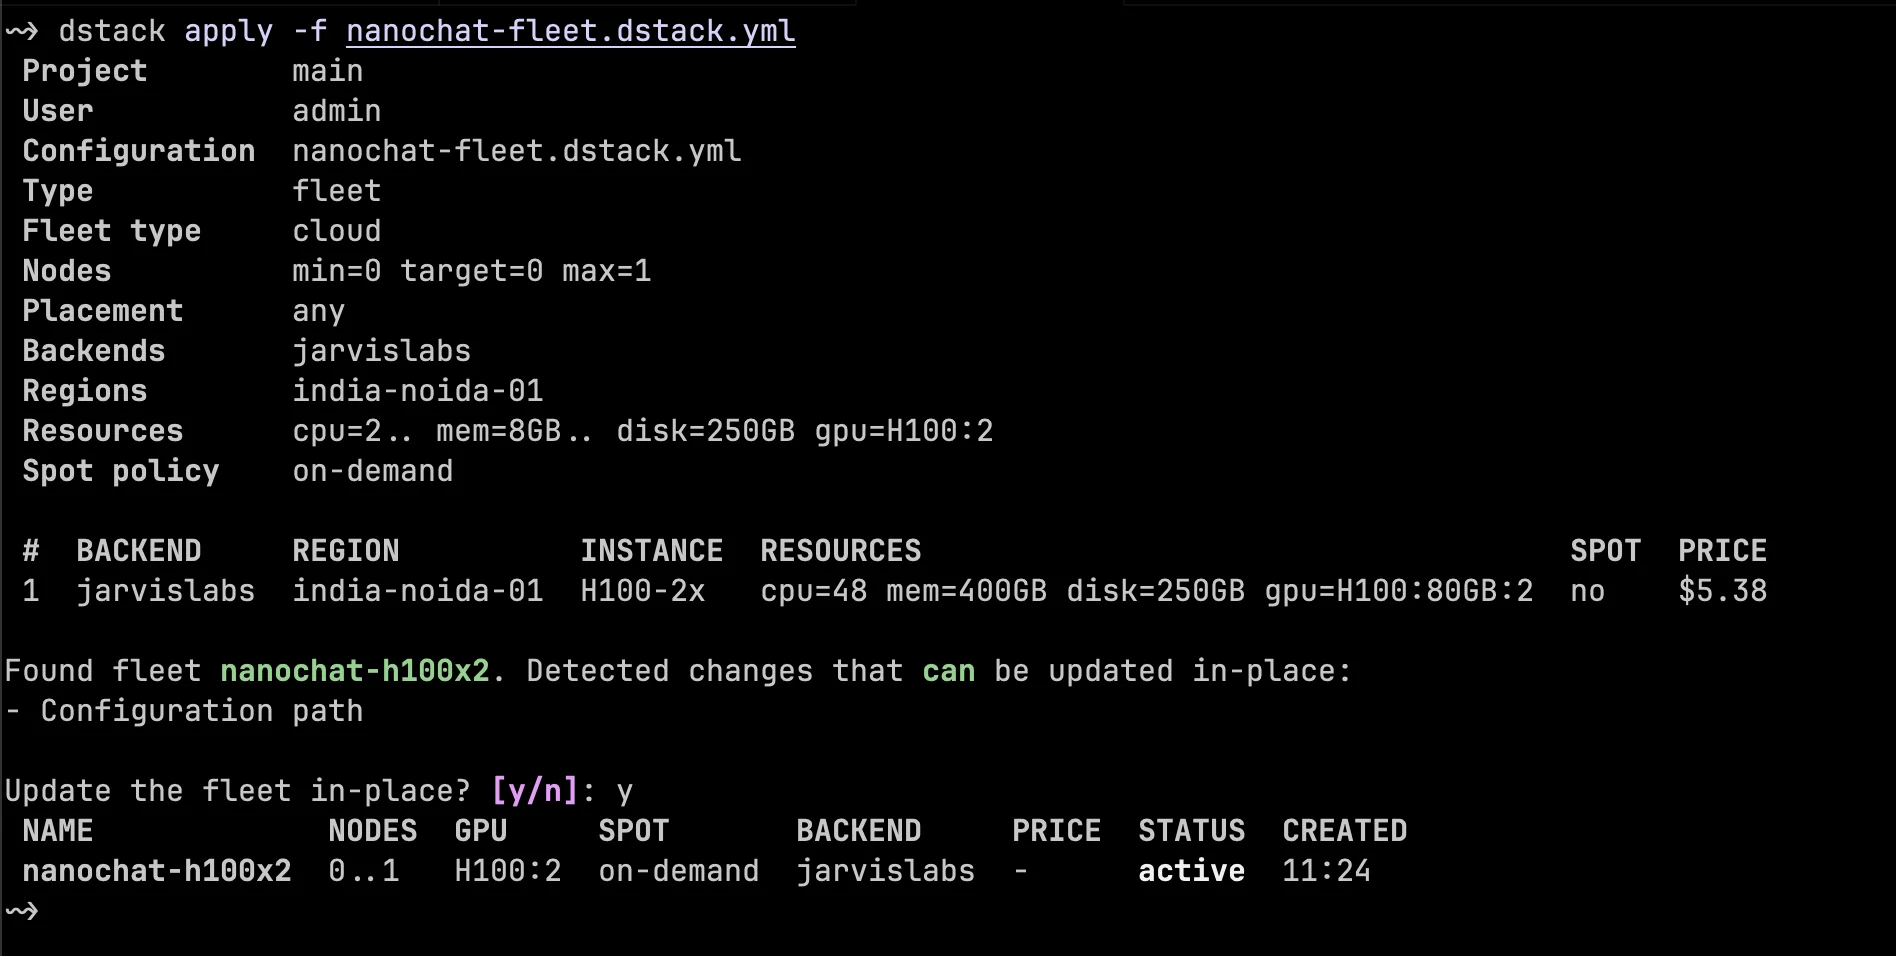
This fleet uses the same JarvisLabs backend as before, but asks for a larger VM: two H100 GPUs and 250 GB of disk. Again, nodes: 0..1 means dstack can create up to one machine from this fleet, and that machine has the resources listed under resources. We set idle_duration: 0s so the VM is eligible for cleanup immediately after it becomes idle. For short expensive runs, that is usually the safest default.
Now define the nanochat task:
type: task
name: nanochat-h100x2

python: "3.11"

fleets: [nanochat-h100x2]

repos:
  - url: https://github.com/karpathy/nanochat.git
    path: /workspace/nanochat

commands:
  - |
    cd /workspace/nanochat
    uv sync --extra gpu --frozen
    source .venv/bin/activate
    python -m nanochat.dataset -n 2
    python -m scripts.tok_train --max-chars=200000000
    python -m scripts.tok_eval
    torchrun --standalone --nproc_per_node=2 -m scripts.base_train -- \
      --depth=12 \
      --num-iterations=300 \
      --device-batch-size=32 \
      --run=dummy \
      --model-tag=dstack_h100x2_demo \
      --core-metric-every=-1 \
      --eval-every=-1 \
      --sample-every=-1 \
      --save-every=-1 \
      --fp8

resources:
  gpu: H100:2
  disk: 250GB
Save this as nanochat-task.dstack.yml.
There are two useful dstack ideas in this task. The first is repos. Instead of uploading a local script, we ask dstack to clone the nanochat GitHub repo directly into /workspace/nanochat inside the container. This is a clean pattern for examples, CI checks, and jobs where the repo already contains the training code.
The second idea is that dstack can also work with local files when you need it. If you are iterating on code that is still on your machine, you can use files to upload a file or directory into the container. For this tutorial, we are keeping the example repo-only on purpose: the YAML points at nanochat, runs nanochat's own commands, and keeps the whole demo in one dstack task file.
The commands install nanochat's GPU dependencies with uv sync --extra gpu, activate nanochat's .venv, then run the dataset, tokenizer, and training commands inside that same environment. Nanochat's README suggests a depth=12 model for quick experiments, and here we also set --num-iterations=300 so this run finishes in a reasonable window for brevity. The setup steps can still take a little longer on the first run because the VM has to install dependencies and download data.
Submit the task:
dstack apply -f nanochat-task.dstack.ymlOnce you submit the task, dstack provisions the H100 VM from the fleet and starts streaming logs from the container. In the recording below, you can see the first few steps of the nanochat run: dependencies are prepared, data and tokenizer commands start running, and the training logs stay attached to the same dstack run.
The same task file can also be used for recurring jobs. If you want to run a benchmark check or CI-style validation on a schedule, add a schedule block with cron syntax:
schedule:
  cron: "15 23 * * *"
This starts the task at specific UTC times while keeping the same JarvisLabs fleet policy, so scheduled runs still get provisioned and cleaned up through dstack.
Practical use cases
Once the basic fleet and task flow is clear, the same pattern can cover a lot of day-to-day GPU work:
- Training and fine-tuning jobs: keep the command, GPU requirements, Docker image, and cleanup policy in one YAML file.
- Benchmarks and evals: run the same workload repeatedly on the same class of GPU, with logs and history stored on the dstack server.
- Team workflows: run the dstack server on a shared VM so everyone submits jobs to the same project, sees the same dashboard, and uses the same fleet policies.
- Services: use dstack services when you want to keep an inference API, model server, or internal GPU tool running instead of exiting after one command.
- Interactive development: use dev environments when you want a GPU-backed remote workspace for notebooks, debugging, or turning an experiment into a repeatable task later.
- Agent-driven infrastructure: dstack also ships an agent skill for tools like Claude, Codex, and Cursor. Once installed, your agent can help write dstack configs, submit workloads, inspect logs, and manage fleets from the CLI.
All of these workflows follow the same mental model. You define where compute comes from with a backend, describe what machines dstack can create with a fleet, and submit tasks, services, or dev environments against that policy. If you want agents to help with this workflow, install the dstack skill with npx skills add dstackai/dstack; the official setup is covered in the dstack installation docs.
Conclusion
In this tutorial, we connected dstack to JarvisLabs, created an elastic fleet, ran a first task on 2x L4, and then ran nanochat on 2x H100 by cloning the repo directly inside the task. Along the way, we saw how the dstack server holds the state, how fleets control cost, how tasks run inside containers on JarvisLabs VMs, and how logs and cleanup are handled from the same workflow.
If you already use dstack, the JarvisLabs backend gives you another place to run GPU workloads with the same YAML workflow you use elsewhere. If you are coming from JarvisLabs, dstack gives you a higher-level way to define repeatable jobs, team workflows, services, and dev environments while still running on JarvisLabs infrastructure.
We are starting with the L4, H100 and CPU VMs and more options are coming soon. Try out the JarvisLabs workflow in dstack, and let us know if you have feedback or run into any issues.
Get Started
Build & Deploy Your AI in Minutes
Cloud GPU infrastructure designed specifically for AI development. Start training and deploying models today.
View Pricing