🧬 Getting started with ComfyUI
Experience ComfyUI - The most powerful and modular stable diffusion GUI with a graph/nodes interface.
- Installing ComfyUI
- Launch ComfyUI
- Adding models to ComfyUI
- Adding custom nodes manually
- Installing ComfyUI Manager
- Adding custom nodes using ComfyUI Manager
- Recommended ComfyUI custom nodes
- Setting up ComfyUI API server
- Run ComfyUI on Jarvislabs
Installing ComfyUI
You can run ComfyUI easily on your own machine or any GPU cloud instances like Jarvislabs.ai.
On a linux machine you can follow the below steps to get started.
# Clone the comfyui main repo
git clone https://github.com/comfyanonymous/ComfyUI

# Create a virtual environment, you can skip it too.
cd ComfyUI
python -m venv comfyui_env
source comfyui_env/bin/activate

pip install -r requirements.txt
The readme.md file has complete set of instructions for installing ComfyUI on different platforms like Windows, Apple silicon and AMD GPUs.
Launching Comfyui
From the terminal, you can run the below command to start Comfyui dashboard.
python main.py
Adding models to ComfyUI
Download models from one of your favourite places. Huggingface and Civitai offers 100's of stable diffusion checkpoints.
# If you are downloading checkpoint, Then you need to placed under
cd ComfyUI/models/checkpoints

# Please note that. Every models requires to download in their respective location. For example loRA are placed under
cd ComfyUI/models/loras
Once you find, Which model you want to download. Copy the download link which ends with ?download="true".
# you can use the wget to download the model from the insternet
wget --content-disposition https://huggingface.co/stabilityai/stable-diffusion-xl-base-1.0/resolve/main/sd_xl_base_1.0_0.9vae.safetensors?download=true
You can replace the url with models url of your choice.
Watch this video, How to get the download link. Click here
Jarvislabs ComfyUI instance, comes with 50+ models, so that you can focus on your creativity.
Adding custom nodes manually
You can also download the custom nodes manually but you need to find the github repo and follow the instruction in their readme file.
Here is a example, How to download a custom node called "ComfyUI_IPAdapter_plus" manually. Follow the below steps
# Always remember that all the custom nodes to be installed under this location
cd ComfyUI/custom_nodes

# You need to git clone the github repo using git command
git clone https://github.com/cubiq/ComfyUI_IPAdapter_plus.git
If the repo contain requirement.txt file. Then you need to run pip command to install the dependencies.
cd  ComfyUI_IPAdapter_plus
pip install -r requirements.txt
If it doesn't contain requirement.txt file. Make sure to read the readme file and check for manual installation
Installing Comfyui Manager
ComfyUI-Manager is a extension created to manage ComfyUI custom nodes. It comes with tools to easily add, delete, turn off, or activate different custom nodes in ComfyUI. Additionally, the extension includes a central hub and user-friendly features for accessing a variety of information within ComfyUI.
To install the comfyui manager, Use the below command
# Move to the custom nodes folder
cd ComfyUI/custom_nodes

# clone the comfyui manager using git clone
git clone https://github.com/ltdrdata/ComfyUI-Manager.git
Once you done the above steps. Make sure to restart the comfyui server and it will install all the dependiences needed to run the comfyui manager
You can do a simple Ctrl+c from the commandline prompt to kill the running comfyui and start it back.
Incase you are running it in the background, then follow the below steps.
ps aux | grep python main.py

# Get the process_id from the above output.
kill process_id

# start the comfyui using main.py
python main.py

# make sure to run the above command in the correct directory[inside the comfyui].
You can use ComfyUI manager to do the below tasks
- Update ComfyUI or any nodes in few clicks.
- Install missing custom nodes in your imported workflows.
- Browse and install custom nodes.
- Browse and download models.
- Save snapshots of your workflows.
- Share your workflows on various platforms.
Adding custom nodes using ComfyUI Manager
Installing custom nodes using comfyui manager is pretty simple. Click the manager button and click the install custom nodes. Then just enter the name of the custom node you want to install in the search bar. Click the install button. Once its done make sure to click the restart button to restart the comfyui server.
Watch the below video, How to install custom nodes using comfyui manager
Click here
Recommended ComfyUI custom nodes
Here we listed some the most used and popular custom nodes.
Comfyui_controlnet_aux
If you are using controlnet in comfyui. This custom node will help you to understand the different controlnet models. Comfyui_controlnet_aux is made by lllyasviel.
github link : repo learn more about in this readme
ComfyUI_IPAdapter_plus
This custom node is very helpful for face swapping worfklows using ipadapter. The IPAdapter models are very useful for changing one image based on another image. You can transfer the main subject or even just the style of the reference image(s) onto the image you want to generate
github link : repo learn more about in this readme
Was-node-suite-comfyui
This custom node is for text encoding and image crop or resize. It also provides codec nodes for videos too. This node is very helpful if you're working on image to image workflow or video workflow in comfyui.
github link : repo learn more about in this readme
If you are using comfyui in Jarvislabs. You will get all the above custom nodes and many other custom nodes as default. Try comfyui
Setup ComfyUI API server
You can set up a ComfyUI server on a ComfyUI instance. To get started you have to install the websocket-client.
pip install websocket-client
Once the websocket-client has been installed - Open the terminal and navigate to the comfyui example scripts folder or paste the below command to find the basic websocket api scripts.
cd ComfyUI/script_examples
Server address
The server address has to be changed respective to where the webui is hosted. If you are using comfyui in local machine then there's no need to change the server address otherwise you need to change the server address to the respective cloud provider url address.
If you want to run the websocket api from the terminal of a JarvisLabs' instance you have to set the server address as below.
server_address = "0.0.0.0:6006"
If you want to access websocket api of your JarvisLabs' instance from a local machine or another device you can simply copy the "API" link address of the comfyui instance from the instances page.
Example
server_address = "https://******.notebooksll.jarvislabs.net/"
Saving the workflow in API format
Change the prompt variable which contains the workflow in api format as a string. You can save your workflow as api format. First you need to enable the dev setting. Follow the below steps.
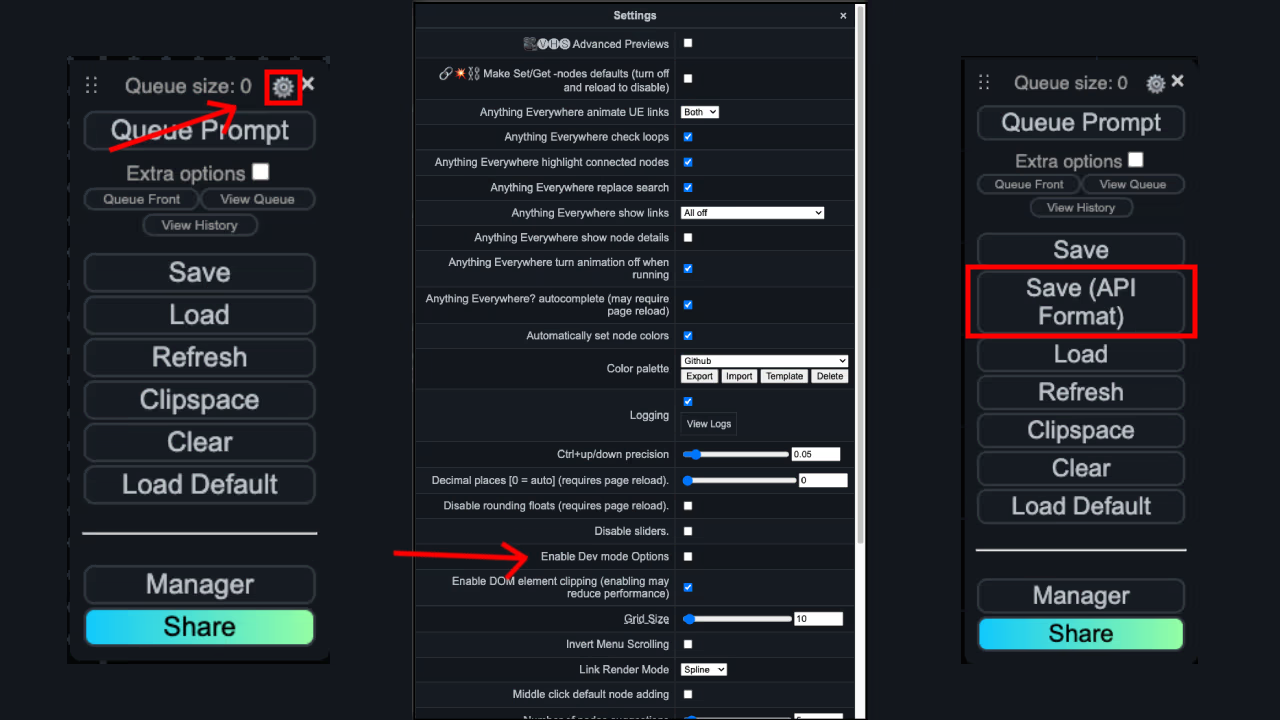 After you can see the Save the workflow as API button, you can use that to download the indexed workflow.
Replace the indexed workflow with the prompt text variable in the websocket script file to inference your desired workflow.
Running the script
You can use the below command to use the script
python websockets_api_example.py
Run ComfyUI on Jarvislabs
Make sure to have sufficient balance in your wallet to launch a comfyui instance. Follow the below steps.
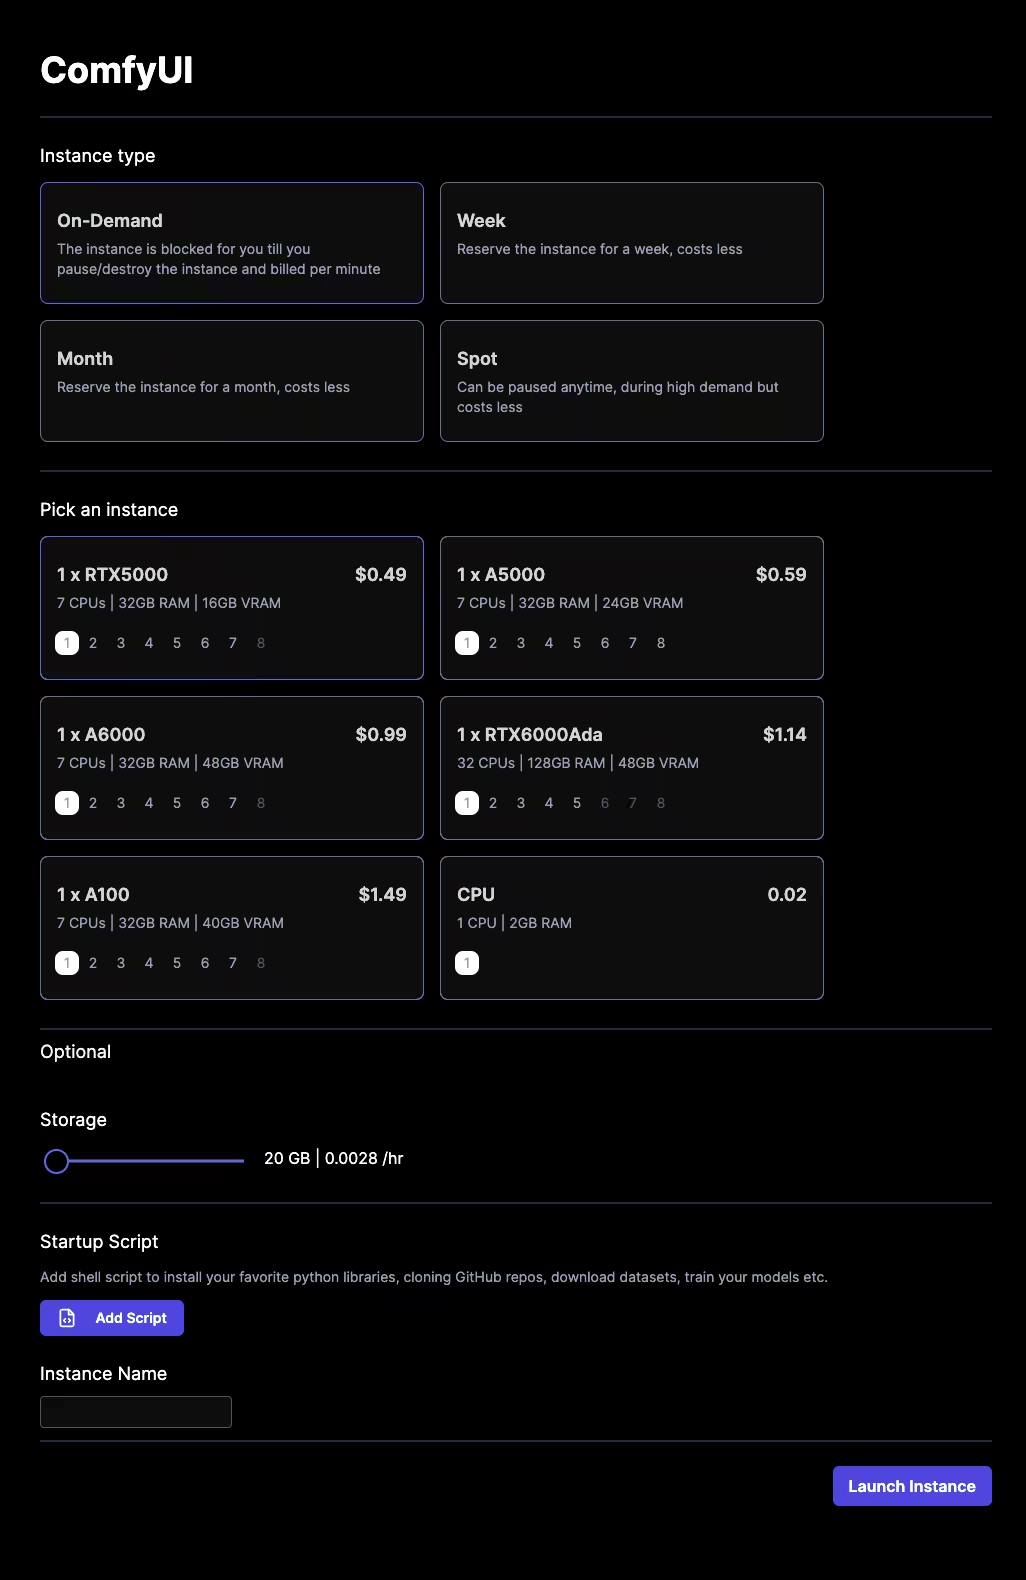
Launch an instance
Start an instance with the framework as ComfyUI. Choose the required GPUs and storage.
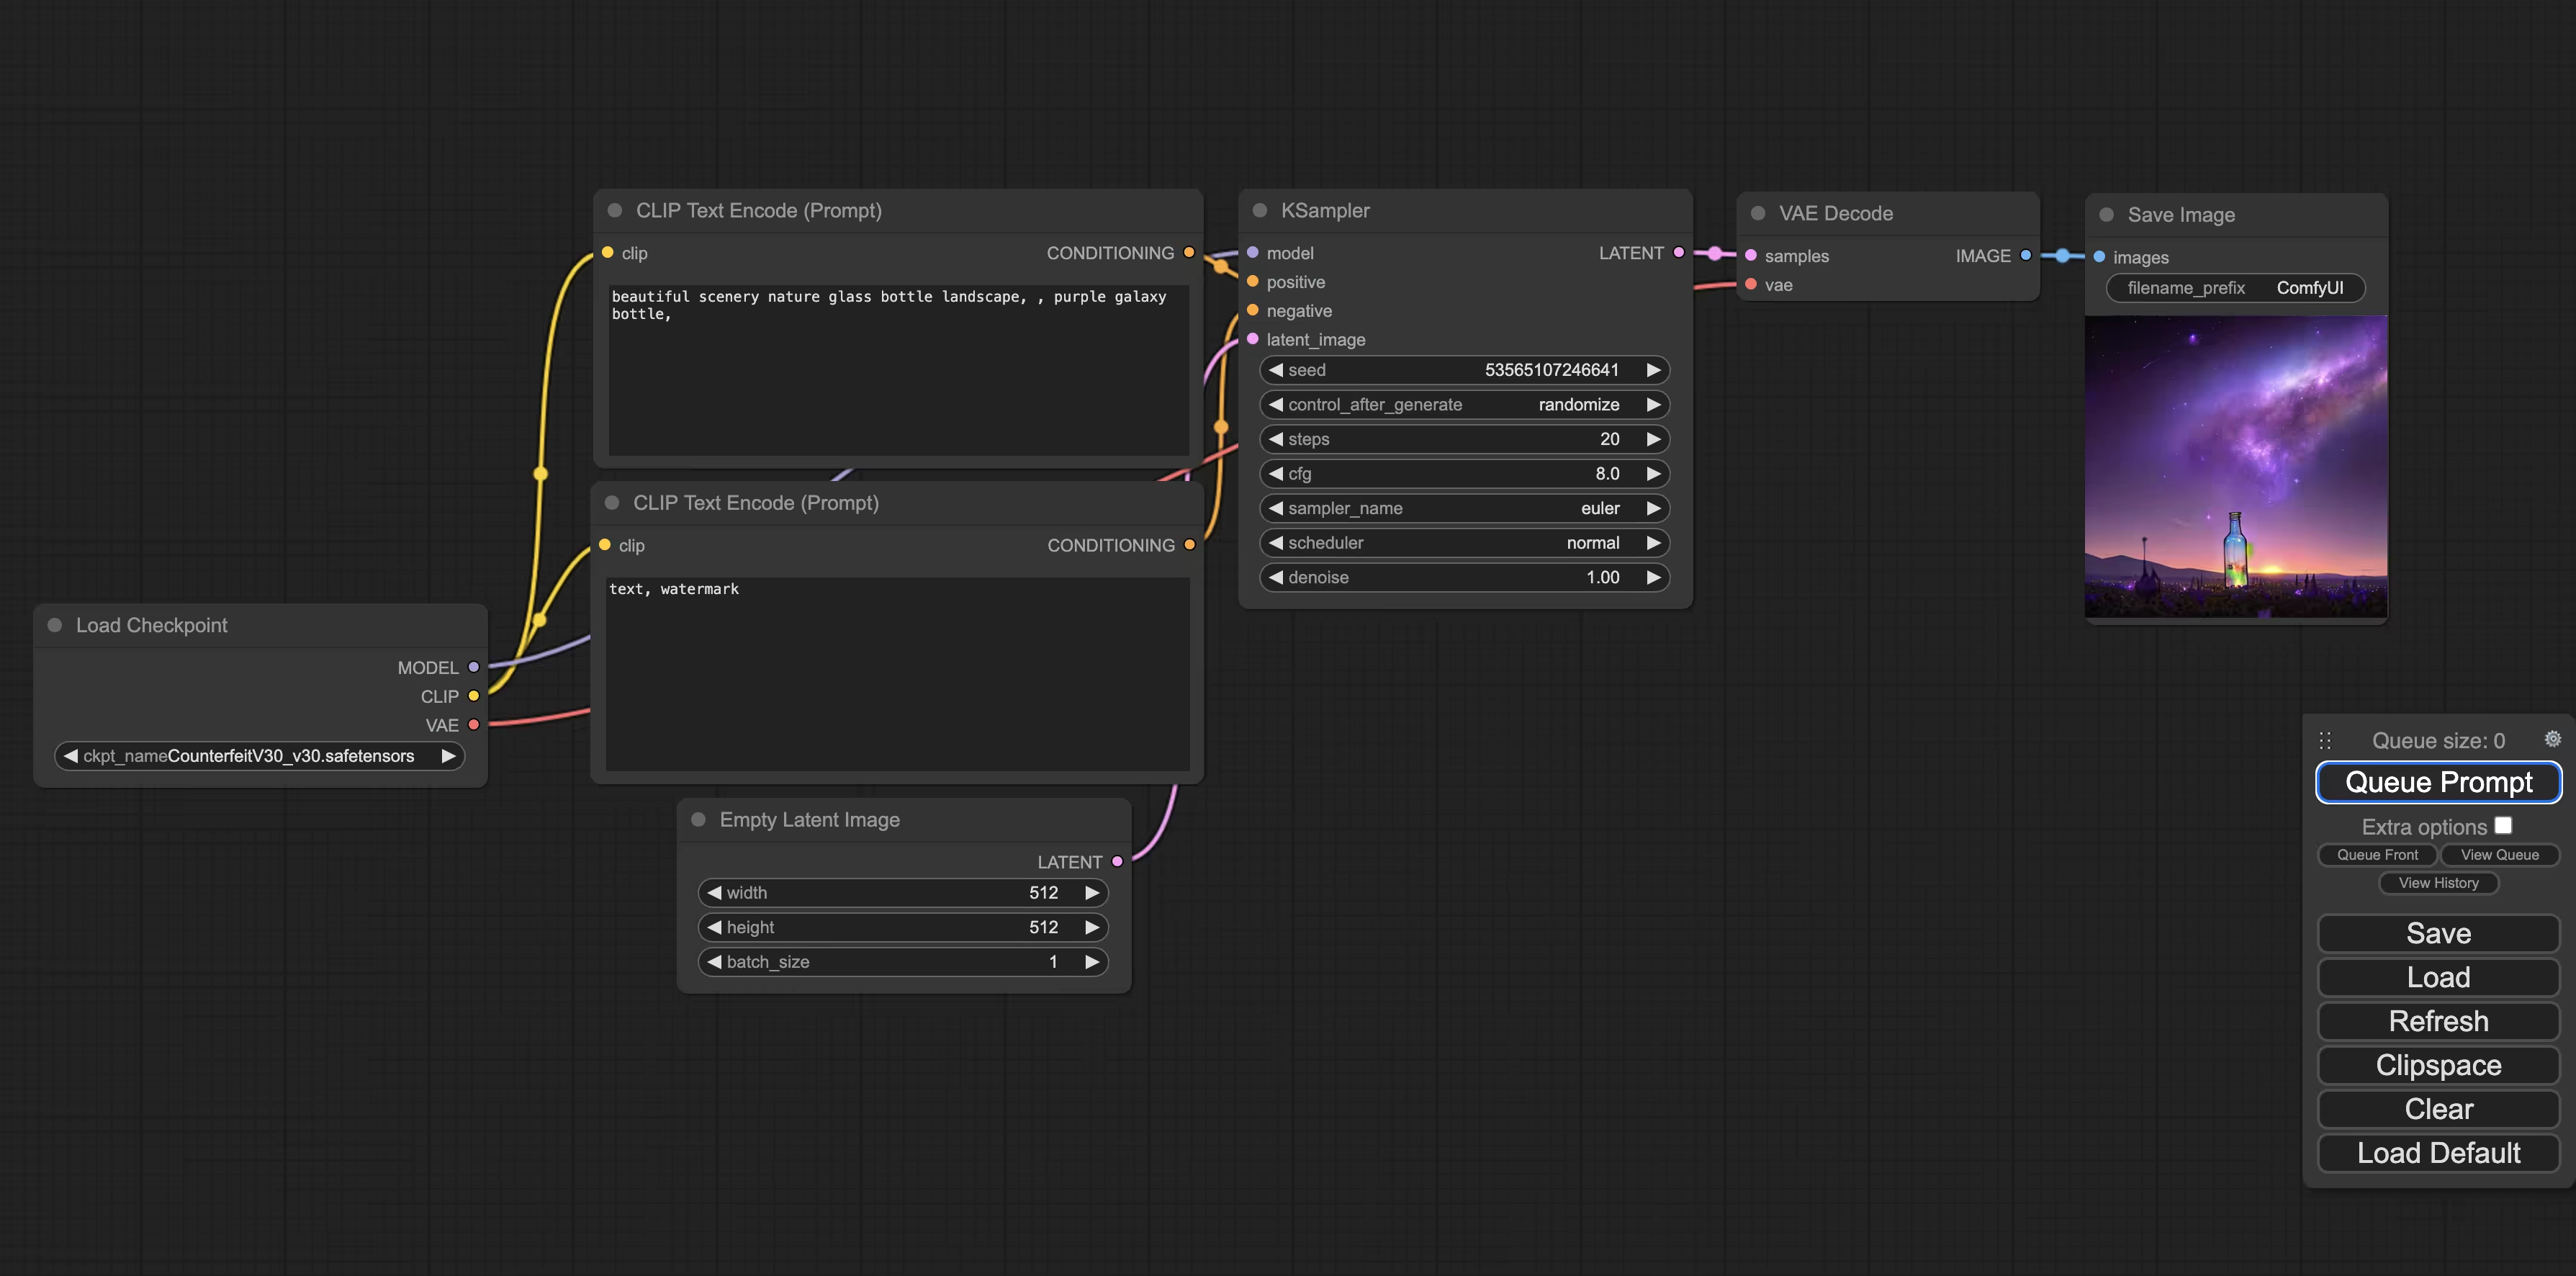
Start with your creative journey
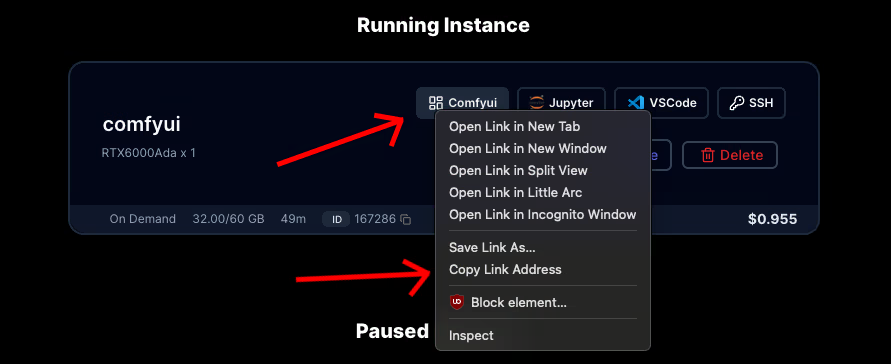
Once the instance is up and running, right-click on your running instance and select the API endpoint to access the comfyUI.
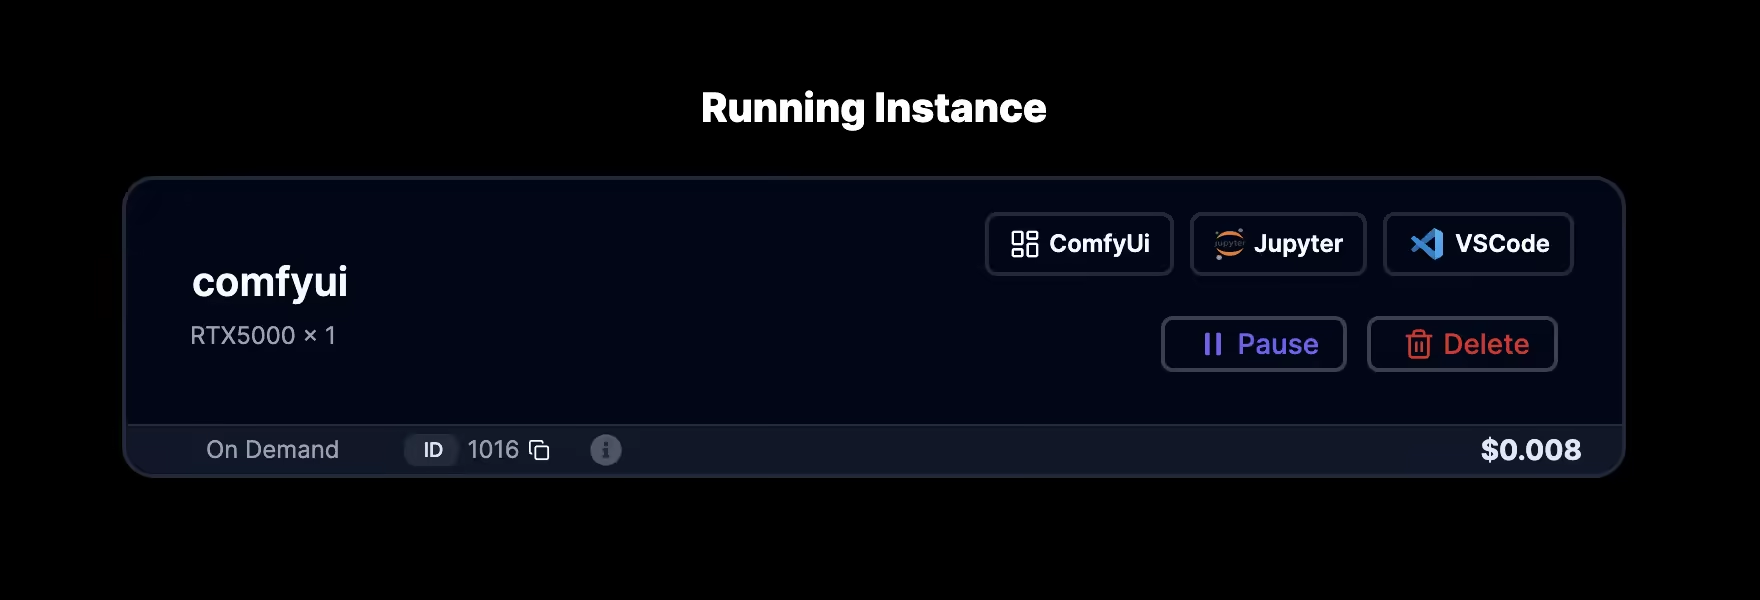
This may take a few seconds to load. You can start with your creative journey.
Launch/Modify the parameters used to launch
When the instance is started, we start the main.py in the background so to kill the process. Open a terminal in jupyterLab notebook.
In the terminal run the below command
ps aux
Hopefully you will see the python main.py running in 6006 port, Copy the kill command below and paste it in the terminal.
# PID is the processing id (Example: 22 or 35)
kill -9 <PID>
To restart the main.py paste the below command.
# Make sure to run this command in /home
python ComfyUI/main.py --port 6006 --listen 0.0.0.0
FAQs
On Your Own PC:
Hardware
- GPU: A decent NVIDIA GPU with at least 8GB of VRAM (e.g., RTX 3060 Ti or higher).
- CPU: A modern processor (i5 or Ryzen 5 or higher).
- RAM: 16GB or more.
Software
- Operating System: Windows 10/11 or Linux.
- Python: Python 3.10 with libraries like PyTorch and CUDA Toolkit pre-installed.
- Command Line: Basic comfort with command prompts.
Additional
- Download files for the Stable Diffusion model (e.g., 1.5 or 2.1) and ComfyUI itself.
- Sufficient storage space on your PC for models and generated images.
Using an Online GPU Instance:
Hardware
- No powerful PC needed; processing happens on cloud servers.
Software
- Web Browser: Any modern browser like Chrome, Firefox, Edge, etc.
- Internet Connection: Stable and high-speed for smooth processing and file transfers.
- Cloud Account: Sign up for a service providing access to powerful GPUs for a fee (e.g., Jarvislabs, Google Colab, Paperspace).
Choose the option that best suits your budget, technical skills, and available hardware.